For many homeowners, the idea of replacing windows themselves can be daunting, yet with the right preparation and understanding, along with helpful replacement window installation tips, it can also be a rewarding project. DIY window replacement offers not only a way to save on costs but also the satisfaction of having improved your home with your own hands.
In this guide, we’ll explore essential replacement window installation tips and outline a DIY window replacement guide to help you avoid common pitfalls and ensure a successful project.
Plan Your Window Installation Project
According to the U.S. Department of Energy, correctly installed energy-efficient windows can help reduce energy bills by an average of 13%. This is particularly significant in colder regions where heating costs can make up a substantial portion of a household’s energy consumption.
Isn’t it time you started to plan your window installation project so you can start enjoying energy savings?
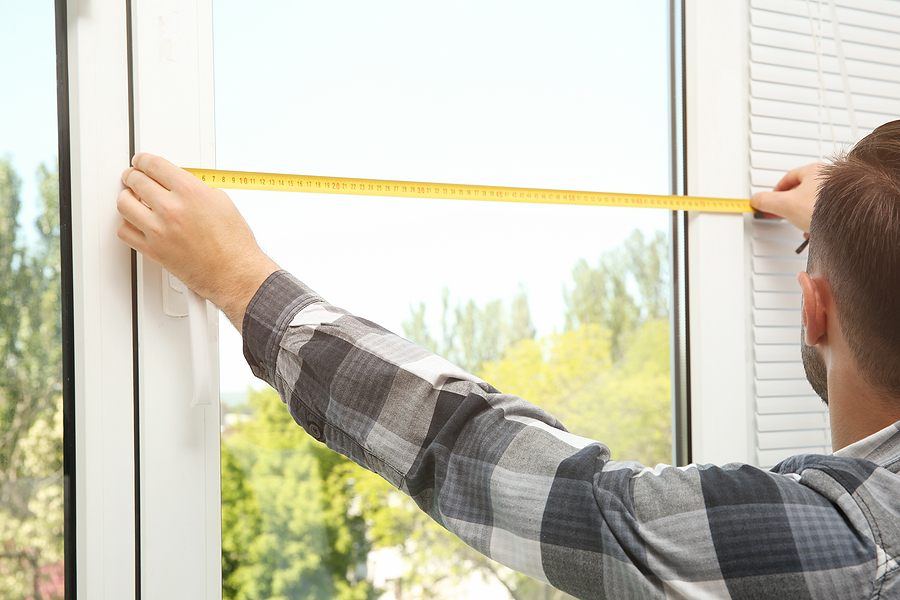
Measure Accurately
One of the biggest mistakes in window replacement is improper measurement. Ensure you measure the existing window frame thoroughly to get an exact fit for your new windows. Measure the width and height from multiple points; use the smallest measurement to ensure the new window will fit.
Choose the Right Windows
Not all replacement windows are created equal. Select windows that not only fit the aesthetic of your home but are also appropriate for your climate. Look for energy-efficient windows with good ratings that will help reduce your heating and cooling costs.
Tools and Materials
Before you begin, gather all the necessary tools and materials. You’ll need:
- Measuring tape
- Level
- Hammer
- Pry bar
- Caulk gun
- Waterproof shims
- Insulation
- Screwdriver
- Flashing tape
Removal of Old Windows
Remove the old window carefully. Start by gently prying off the molding and any stops that may be reusable with your pry bar. Do not rush this step to avoid damaging the frame or surrounding wall. Once the stops are removed, you should be able to remove the old window from the frame.
Installation Process
Check and prepare the opening. Once the old window is removed, check the condition of the window sill and frame. Make sure there is no rot or damage; if there is, repair this before proceeding.
Ensure the opening is square by measuring diagonally in both directions. The measurements should be the same. If not, you will need to adjust the frame using shims.
Dry fit the new window. Before applying any caulk or screws, place the new window in the opening to ensure it fits. This “dry fit” step is crucial to verify that you won’t face any unexpected issues when you go to install the window permanently.
Securing the Window
Install the window. Once confirmed the window fits, remove it and apply a bead of caulk along the inside of the outside stops and the sill. Place the window back into the opening, pressing it firmly against the caulk. Use shims to secure the window, placing them near the screw holes to ensure it is level and plumb.
Secure with screws. Screw the window into place through the pre-drilled holes in the window frame. Be careful not to overtighten the screws, as this can warp the frame.
Finishing Touches
Insulate around the window.Once the window is secured, insulate around the frame to prevent drafts. Use expanding foam insulation designed for windows, as this will provide a better seal and is moisture resistant.
Apply finishing touches. Reapply the interior stops or install new ones if necessary. Caulk around the outside of the window to seal any gaps, ensuring a watertight installation.
Post-Installation
Check the installation. After the window is installed, check its operation. Make sure it opens, closes, and locks smoothly. This step is crucial to ensure that the alignment is correct and that there are no gaps or unevenness.
Clean the area thoroughly, removing any debris or materials, and clean the window itself, removing fingerprints or smudges from the installation.
Common Pitfalls to Avoid
- Skipping the Dry Fit: Never skip the dry fit. This step can save you a lot of trouble if the window doesn’t fit as expected.
- Ignoring Instructions: Always follow the manufacturer’s instructions. Every window is slightly different, and specific steps may be required for your particular product.
- Improper Sealing: Ensure you seal the window properly. Poor sealing can lead to water damage and decreased energy efficiency.
Feeling overwhelmed or unsure if you can tackle window replacement on your own? Don’t worry! Help is just a click away.
Visit Semko Inc. for professional advice, replacement window installation tips and services. Our team of experts is ready to help ensure your window replacement project is a success, saving you time and giving you peace of mind.
By following this detailed DIY window replacement guide, you can successfully replace your windows and enjoy the benefits of new, energy-efficient windows that improve both the comfort and value of your home. Contact us to learn more today!